Home › Forums › Cortado Contact Microphone Forum › Cortado FAQ & Support › Cortado as a Boundary Mic
- This topic has 7 replies, 2 voices, and was last updated 8 years, 9 months ago by
solarbird.
-
AuthorPosts
-
solarbird
ParticipantI’m finally experimenting with that boundary microphone idea, and trying to build a non-boundary crystal microphone as well, both using Cortado parts. Part of that involved making the Cortado amp circuit modular, so I could do a lot of experimenting without having to resolder anything involving the main circuit all the time.
Here’s a writeup on what’s finished so far, also with experiments using various materials on the mic receiver and a sound sample.

More pictures at the build report.
eta: Glen: Thanks! I’ve got further ideas to improve that bridge pickup – or more specifically, two ideas – and I have material to try them both. So if I get a substantial improvement, I’ll let you know. ^_^
Glen v A
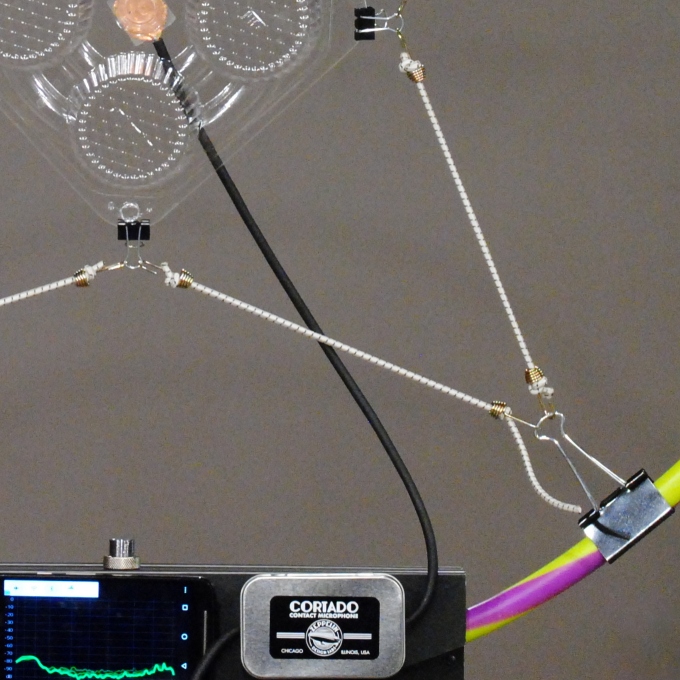
ParticipantGreat write-up, Solarbird (below). We are thinking same-same regarding resonator elements for a neo-crystal mic. Very soon we will publish a new instructable on building the Hula Mic: a crystal mic built from bungee cords, binder clips, a hula hoop and a clock face — and of course a Cortado contact mic. A companion article will detail our own research, which led to similar conclusions: the performance of the resonator depends on not only its mass, but its density and rigidity. Guess what material wins that contest?
Here’s a sneak peek.

solarbird
Participantooooh, I like that test harness. Neat!
Also important is whether the material has an obvious resonance frequency. That’s killed a couple of materials, including some really interesting ultra-light carbon fibre material I tried. (But didn’t photograph. My loss.) I didn’t expect that to have a ring but it really did.
I’m gonna build a base-of-styro-cup assembly hopefully today. I’ve figured out a mounting system to try that… wow I’m just really hoping it works, because it’ll be awfully cool.
Glen v A
ParticipantWhen suspended in this harness (hula mic), we got the best results from a small styrofoam bowl, styrofoam dessert plate, and styrofoam clamshell, with or without food compartments. On a shape like the bowl or compartmental-clamshell, the piezo placement has an enormous impact on low end: if you have the option of partially extending the piezo off the back of the resonator, into space, it can add dramatically to the low end and increase the naturalness of the sound. Leaving it dead center gives the narrowest response, and the best “old time broadcast” sound.
solarbird
ParticipantYou know what I want to get my hands on? Some Aerogel in test quantities. No idea how’d work but I’d love to find out. Sadly, playing-card-sized tiles are $200 online and while it is really easy to make, I’d need to be back in the bio lab in order to do it without killing or maybe just blinding myself.
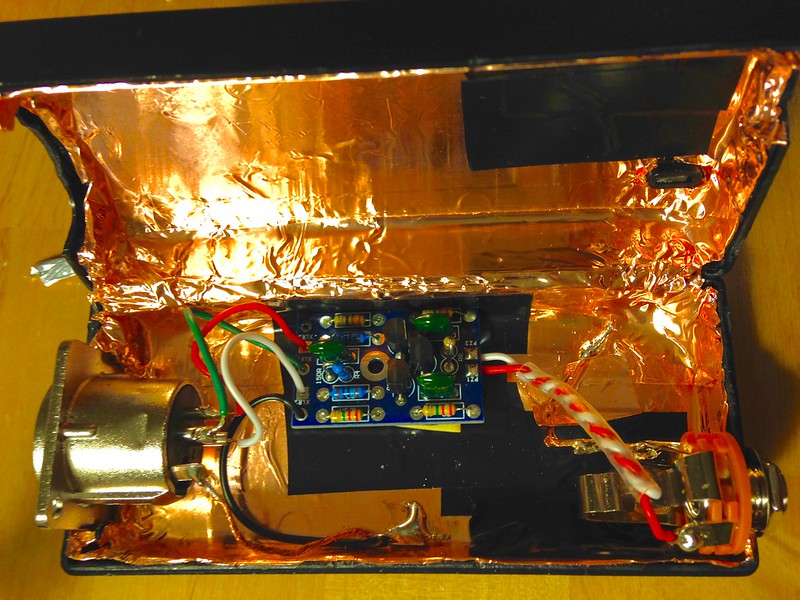
The other thing going on at the moment is that I some of my whitenoise problems are showing up basically when I move the Cortado amp circuit into this metal-lined plastic case from the usual metal mini-case. I have no idea why and it’s driving my kind of batty. I know the metal lining is grounded and adding another external layer of metal doesn’t help. It’s very frustrating.
Glen v A
ParticipantBrach and I see a number of possible sources of noise.
-
The resonator. As we discussed, the higher the density & mass of the resonator, the more likely it will create a mysterious white noise. In my experiments. the best resonators also picked up ambient noise like crazy, so I couldn’t even isolate this source until I moved into a decent studio space.
The fine leads from the piezo are unshielded.
How are those fine leads attached to the squirly cable? Neatly soldered, I hope, not twisted.
You commented elsewhere that the shielding on your cable may not be great. It’s important.< The grouinding inside the box, which box, by the way, is terribly cool. You have the input jack, output jack and the board all grounded to the copper foil shield. Brach suggests you ground the 1/4" jack to the board, ground the board to XLR pin 1, then ground XLR pin 1 to the copper shield. This gives any errant electron exactly one path to ground, with the shortest, most direct path at the input source. Your current arrangement allows for a few ground loops, which likely accounts for the difference in noise between the two cases.Try fiddling with some of those, especially the ground loops, and let us know if there is improvement.
I am going to move this conversation over to “Product Mods”.solarbird
ParticipantI ended up ditching the box. I swear this makes no sense – none – but: put the circuit in the box: noisy and low-signal. Put the circuit near the box (like, next to, but not touching): noisy and low signal. Move the circuit further away from the box: NOISE DROPS, SIGNAL RISES.
I swear to you I am not making this up. I swear. I discovered the latter bit by accident. I can only assume there is actually some sort of weird cable magic going on that … doesn’t make a lot of sense either. But I’m going with it.
As to the soldering questions: yeah, everything was as described, and I went through (before seeing this) and basically discovered the ground issues on my own – but fixing them changed nothing. (And yes, my little leads off the disc were shielded the entire time, and so on.)
I realise, again, for the record, that this makes absolutely no sense.
MYSTERIES OF SCIENCE, I guess? Or perhaps capacitance in the case. Maybe there’s just Something Odd about the case plastic.
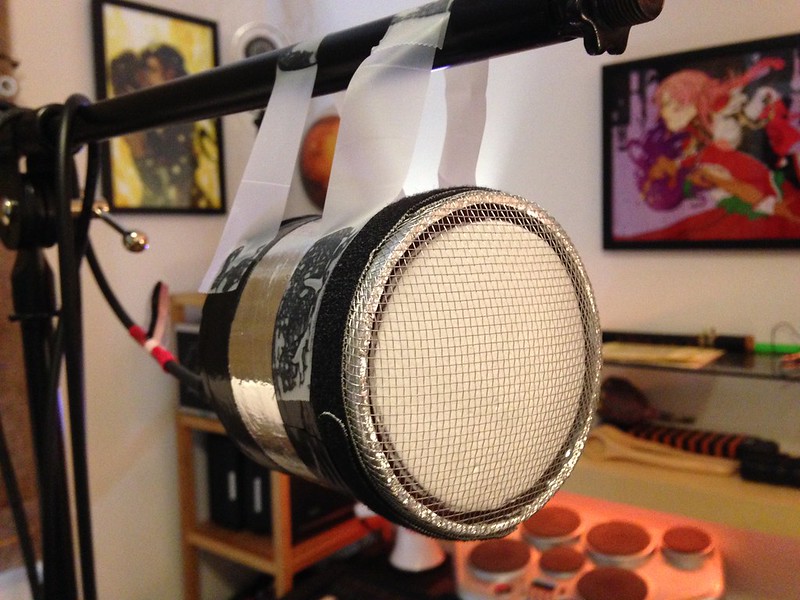
Anyway, out of desperation, I changed tack pretty hard, ditched the modular idea (sadness!) and just decided to build a large diaphragm crystal microphone all in one package. It looks a lot like your Tin Can Microphone but is meaningfully different in that there’s no cone, and no can, even if it looks like a can.
I AM NOT DONE trying the heavier materials though, because the tone I got on the clear plastic from Boeing Surplus back in the day – whatever it might be – was really nice. And I’ve got one more circuit I can experiment with. I may try the modular solution again, with another, no-unknown-plastics/purely metal box.
Here’s a writeup on the new design, with lots of pictures, one of which being this:

-
This reply was modified 8 years, 9 months ago by
solarbird.
solarbird
ParticipantOh, and on the cables I’ve been using: they’re what Westlake Electronics (part of IEWC, as of late) recommended, and they’re AV pro suppliers, so I’d think they know what they’re doing when they recommend cables to me – but I’ve never really been entirely happy with them nonetheless. I don’t like the way they strip, I’m not fond of the single-mode shielding (wire weave and no foil – tho’ I will say it is a damn fine tight weave, it really is)… I dunno, I’ve just had small annoyances with it. I’m possibly just flailing about for reasons, tho’.
-
This reply was modified 8 years, 9 months ago by
-
AuthorPosts


