Forum Replies Created
-
AuthorPosts
-
solarbird
ParticipantI certainly had noise problems with longer cable – but I was also trying to use phone jacks to get modularity, so that might’ve been the real problem. Can’t be sure.
solarbird
ParticipantI ran a bunch of experiments with a little wooden pressure chamber I made, working with the properties of the Cortado pickup’s piezo disc, in a surface-mount configuration.
I thought the data might be interesting for people here, plus I was goofing around and made this spiffy animated spectral analysis progression across the different configuration trials, so I wanted to post it around.
First two graphs are control samples; here’s the key, and lots of details on exactly what I was doing. Sound file at the link, too.
solarbird
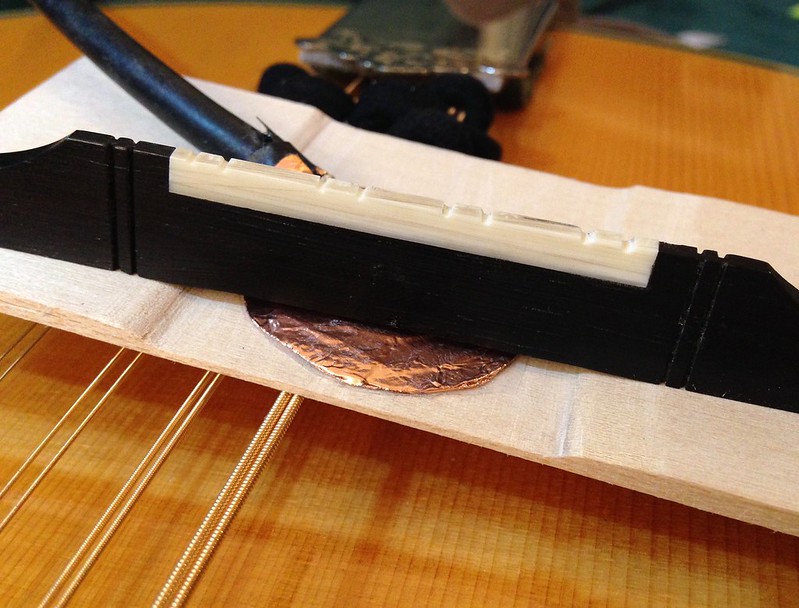
ParticipantVersion 3 (substantially improved) of the Cortado floating bridge pickup, an upgrade from the previous version above. Writeup and comparison sound samples here, but basically, the resonance plate now has a pressure chamber which you use with inserts to put pressure on the piezo’s crystal, and that changes the response profile a lot. Much less EQ needed in live use, which is a big usability win.
<center>
 </center>
solarbird
ParticipantHere’s the writeup – it’ll go live in the morning at 8:30 Pacific. (That’s 22 June 2016):
solarbird
Participantguys
Guys
GUYS
i have DONE IT
iiiiiiiiii found the waaaaaaaaaaaaay
CHECK THIS OUT. 100% raw recording, experimental harness, alternating straight cortado (as per previous mod) with shiny new YES THAT’S RIGHT UNDER THE GODDAMN BRIDGE mod, NO eq, NO efx, just crossfades between the two recordings.
there’s a little mechanical buzz, that’s just because I was, you know, COVERED IN WIRES and such, ignore that. Just bathe in the luxury of an smoooooth no-EQ-needed low-end.
solarbird
ParticipantOh, and on the cables I’ve been using: they’re what Westlake Electronics (part of IEWC, as of late) recommended, and they’re AV pro suppliers, so I’d think they know what they’re doing when they recommend cables to me – but I’ve never really been entirely happy with them nonetheless. I don’t like the way they strip, I’m not fond of the single-mode shielding (wire weave and no foil – tho’ I will say it is a damn fine tight weave, it really is)… I dunno, I’ve just had small annoyances with it. I’m possibly just flailing about for reasons, tho’.
solarbird
ParticipantI ended up ditching the box. I swear this makes no sense – none – but: put the circuit in the box: noisy and low-signal. Put the circuit near the box (like, next to, but not touching): noisy and low signal. Move the circuit further away from the box: NOISE DROPS, SIGNAL RISES.
I swear to you I am not making this up. I swear. I discovered the latter bit by accident. I can only assume there is actually some sort of weird cable magic going on that … doesn’t make a lot of sense either. But I’m going with it.
As to the soldering questions: yeah, everything was as described, and I went through (before seeing this) and basically discovered the ground issues on my own – but fixing them changed nothing. (And yes, my little leads off the disc were shielded the entire time, and so on.)
I realise, again, for the record, that this makes absolutely no sense.
MYSTERIES OF SCIENCE, I guess? Or perhaps capacitance in the case. Maybe there’s just Something Odd about the case plastic.
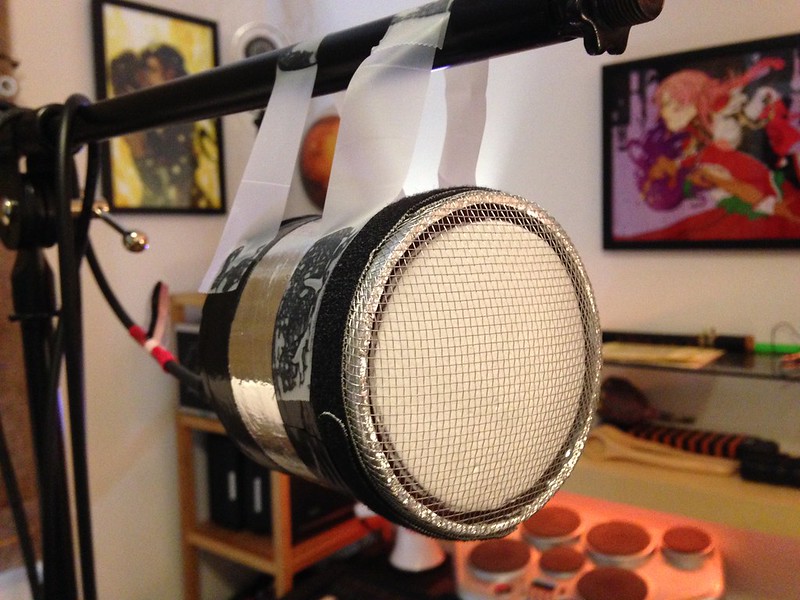
Anyway, out of desperation, I changed tack pretty hard, ditched the modular idea (sadness!) and just decided to build a large diaphragm crystal microphone all in one package. It looks a lot like your Tin Can Microphone but is meaningfully different in that there’s no cone, and no can, even if it looks like a can.
I AM NOT DONE trying the heavier materials though, because the tone I got on the clear plastic from Boeing Surplus back in the day – whatever it might be – was really nice. And I’ve got one more circuit I can experiment with. I may try the modular solution again, with another, no-unknown-plastics/purely metal box.
Here’s a writeup on the new design, with lots of pictures, one of which being this:

-
This reply was modified 8 years, 10 months ago by
solarbird.
solarbird
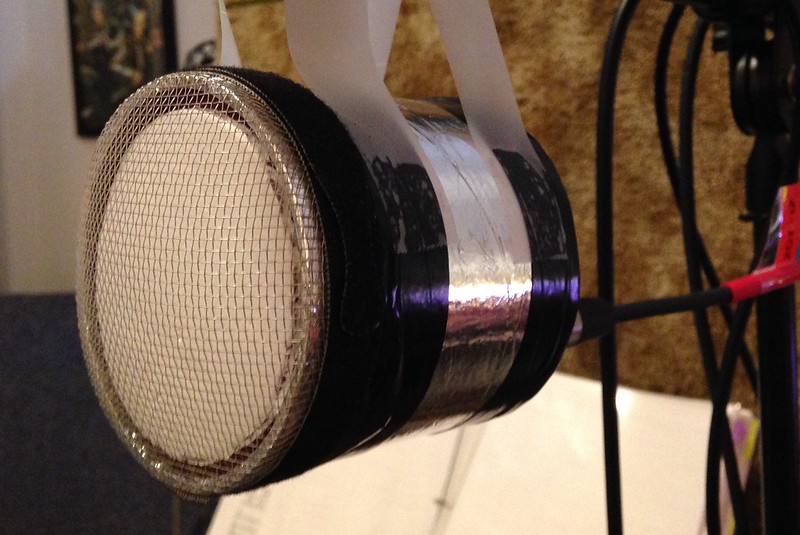
ParticipantThis is not the Cortado Tin Can microphone, though it has similarities, but it is Cortado driven. It’s a crystal mic, more of the sort you’d’ve seen in the late 1930s and through the 1940s, with a large front-facing diaphragm. (That white disc is a solid piece, and that silver “can” is actually metal-tape-lined cardboard.)

Build writeup is in a couple of parts due to reasons, but the big one is here.
solarbird
ParticipantYou know what I want to get my hands on? Some Aerogel in test quantities. No idea how’d work but I’d love to find out. Sadly, playing-card-sized tiles are $200 online and while it is really easy to make, I’d need to be back in the bio lab in order to do it without killing or maybe just blinding myself.
The other thing going on at the moment is that I some of my whitenoise problems are showing up basically when I move the Cortado amp circuit into this metal-lined plastic case from the usual metal mini-case. I have no idea why and it’s driving my kind of batty. I know the metal lining is grounded and adding another external layer of metal doesn’t help. It’s very frustrating.
solarbird
Participantooooh, I like that test harness. Neat!
Also important is whether the material has an obvious resonance frequency. That’s killed a couple of materials, including some really interesting ultra-light carbon fibre material I tried. (But didn’t photograph. My loss.) I didn’t expect that to have a ring but it really did.
I’m gonna build a base-of-styro-cup assembly hopefully today. I’ve figured out a mounting system to try that… wow I’m just really hoping it works, because it’ll be awfully cool.
February 10, 2016 at 2:53 pm in reply to: Question about Cortado assembly instructions, also about temporary attachment. #1077solarbird
ParticipantWhat I was planning was to adhere the cortado to the end of the paddle, and then have the rest of the paddle just held down against the instrument’s face by the floating bridge. There wouldn’t be any soundhole interaction; it would all be pickup directly from the bridge and face of instrument. This lets the paddle run the full length of the bridge (underneath it) rather than requiring the very wide (and fairly long) board which would be needed to allow the cortado to reach over the sound hole.
This will also hopefully give me some useful data I can apply later on the boundary mic project. I want to be able to use these microphones outside, so I’m going to have a largeish resonating plate to which I will have attached 1-2 piezo discs (which I already have), which will be separated from a backplate and side-protective rim, possibly (particularly at first) just by paper tape. This will make the whole resonating plate into (effectively) a large microphone diaphragm, with the backplate used basically as a backside deflector, preventing pickup from that direction – or so I hope, anyway.
Plus it’ll provide attachment points to hang the device, a place to attach the box containing the amplification circuit, etc.
Anyway, if this works well, I’ll at least consider rosewood for that resonating plate. If it’s weak in the high end (strikes me as unlikely) then I’ll consider a lighter material, and so on.
February 4, 2016 at 12:28 am in reply to: Question about Cortado assembly instructions, also about temporary attachment. #1065solarbird
ParticipantOh okay, so this is something to work on! Fun.
I built a new pickup disc (I had many extras already, having ordered them for the boundary microphone project) and one interesting thing is that it did not help with the painter’s tape method, but did improve the situation with the plastic clamp I had. I was able to use it in concert with a plastic clamp. Sadly, I do not have a recording, because the sound crew had unrelated but severe equipment issues that show.
I have not yet tried this new pickup with the 3M Command Adhesive strips, but perhaps I should. Were those to work, it would solve many problems.
Also – and this I find interesting, but confusing – the new, correct-build pickup, while much better with the clamp, did not have as even a bass response as the errant-build pickup (with the extra adhesive and backing tape) did when the errant-built pickup was held in place by hand. Something in the mid-bass went on walkabout. This is also why I want to try again with the command adhesive strips – perhaps that foam will serve the same modulating purpose as the double-sided tape and layer of protective paper. It seems unlikely, but it would be extremely cool if it worked.
It would be interesting to adhese the pickup to a thin plank of material and then place that plank under the bridge. Since my bridges are floating, that could actually be done; the strings would anchor it tightly in place. But they’d have to be very thin material to prevent detuning issues… or perhaps I could get spare bridges and sand them down so they are the correct height with the pickup plank installed!
…that’s an idea.
What would you suggest as a good material for this plank? It should still be thin. We’d be putting it underneath a floating bridge, on the flat face of the instrument, held in place by the bridge which is in turn being held in place by the strings, pressed against the face.
solarbird
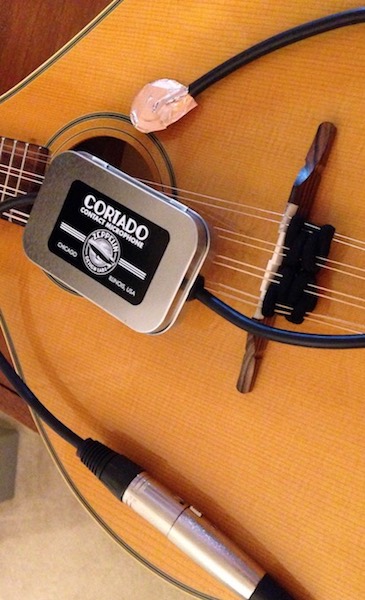
ParticipantI wrote up a build report for a Cortado – it’s over here, on my band blog. I was planning on modding it into a PZM/boundary microphone, but ended up needing this particular kit for a more standard purpose for a show coming up. The PZM project is still on the queue, though.

-
This reply was modified 8 years, 10 months ago by
-
AuthorPosts


 </center>


