- Your cart is empty
- Continue Shopping
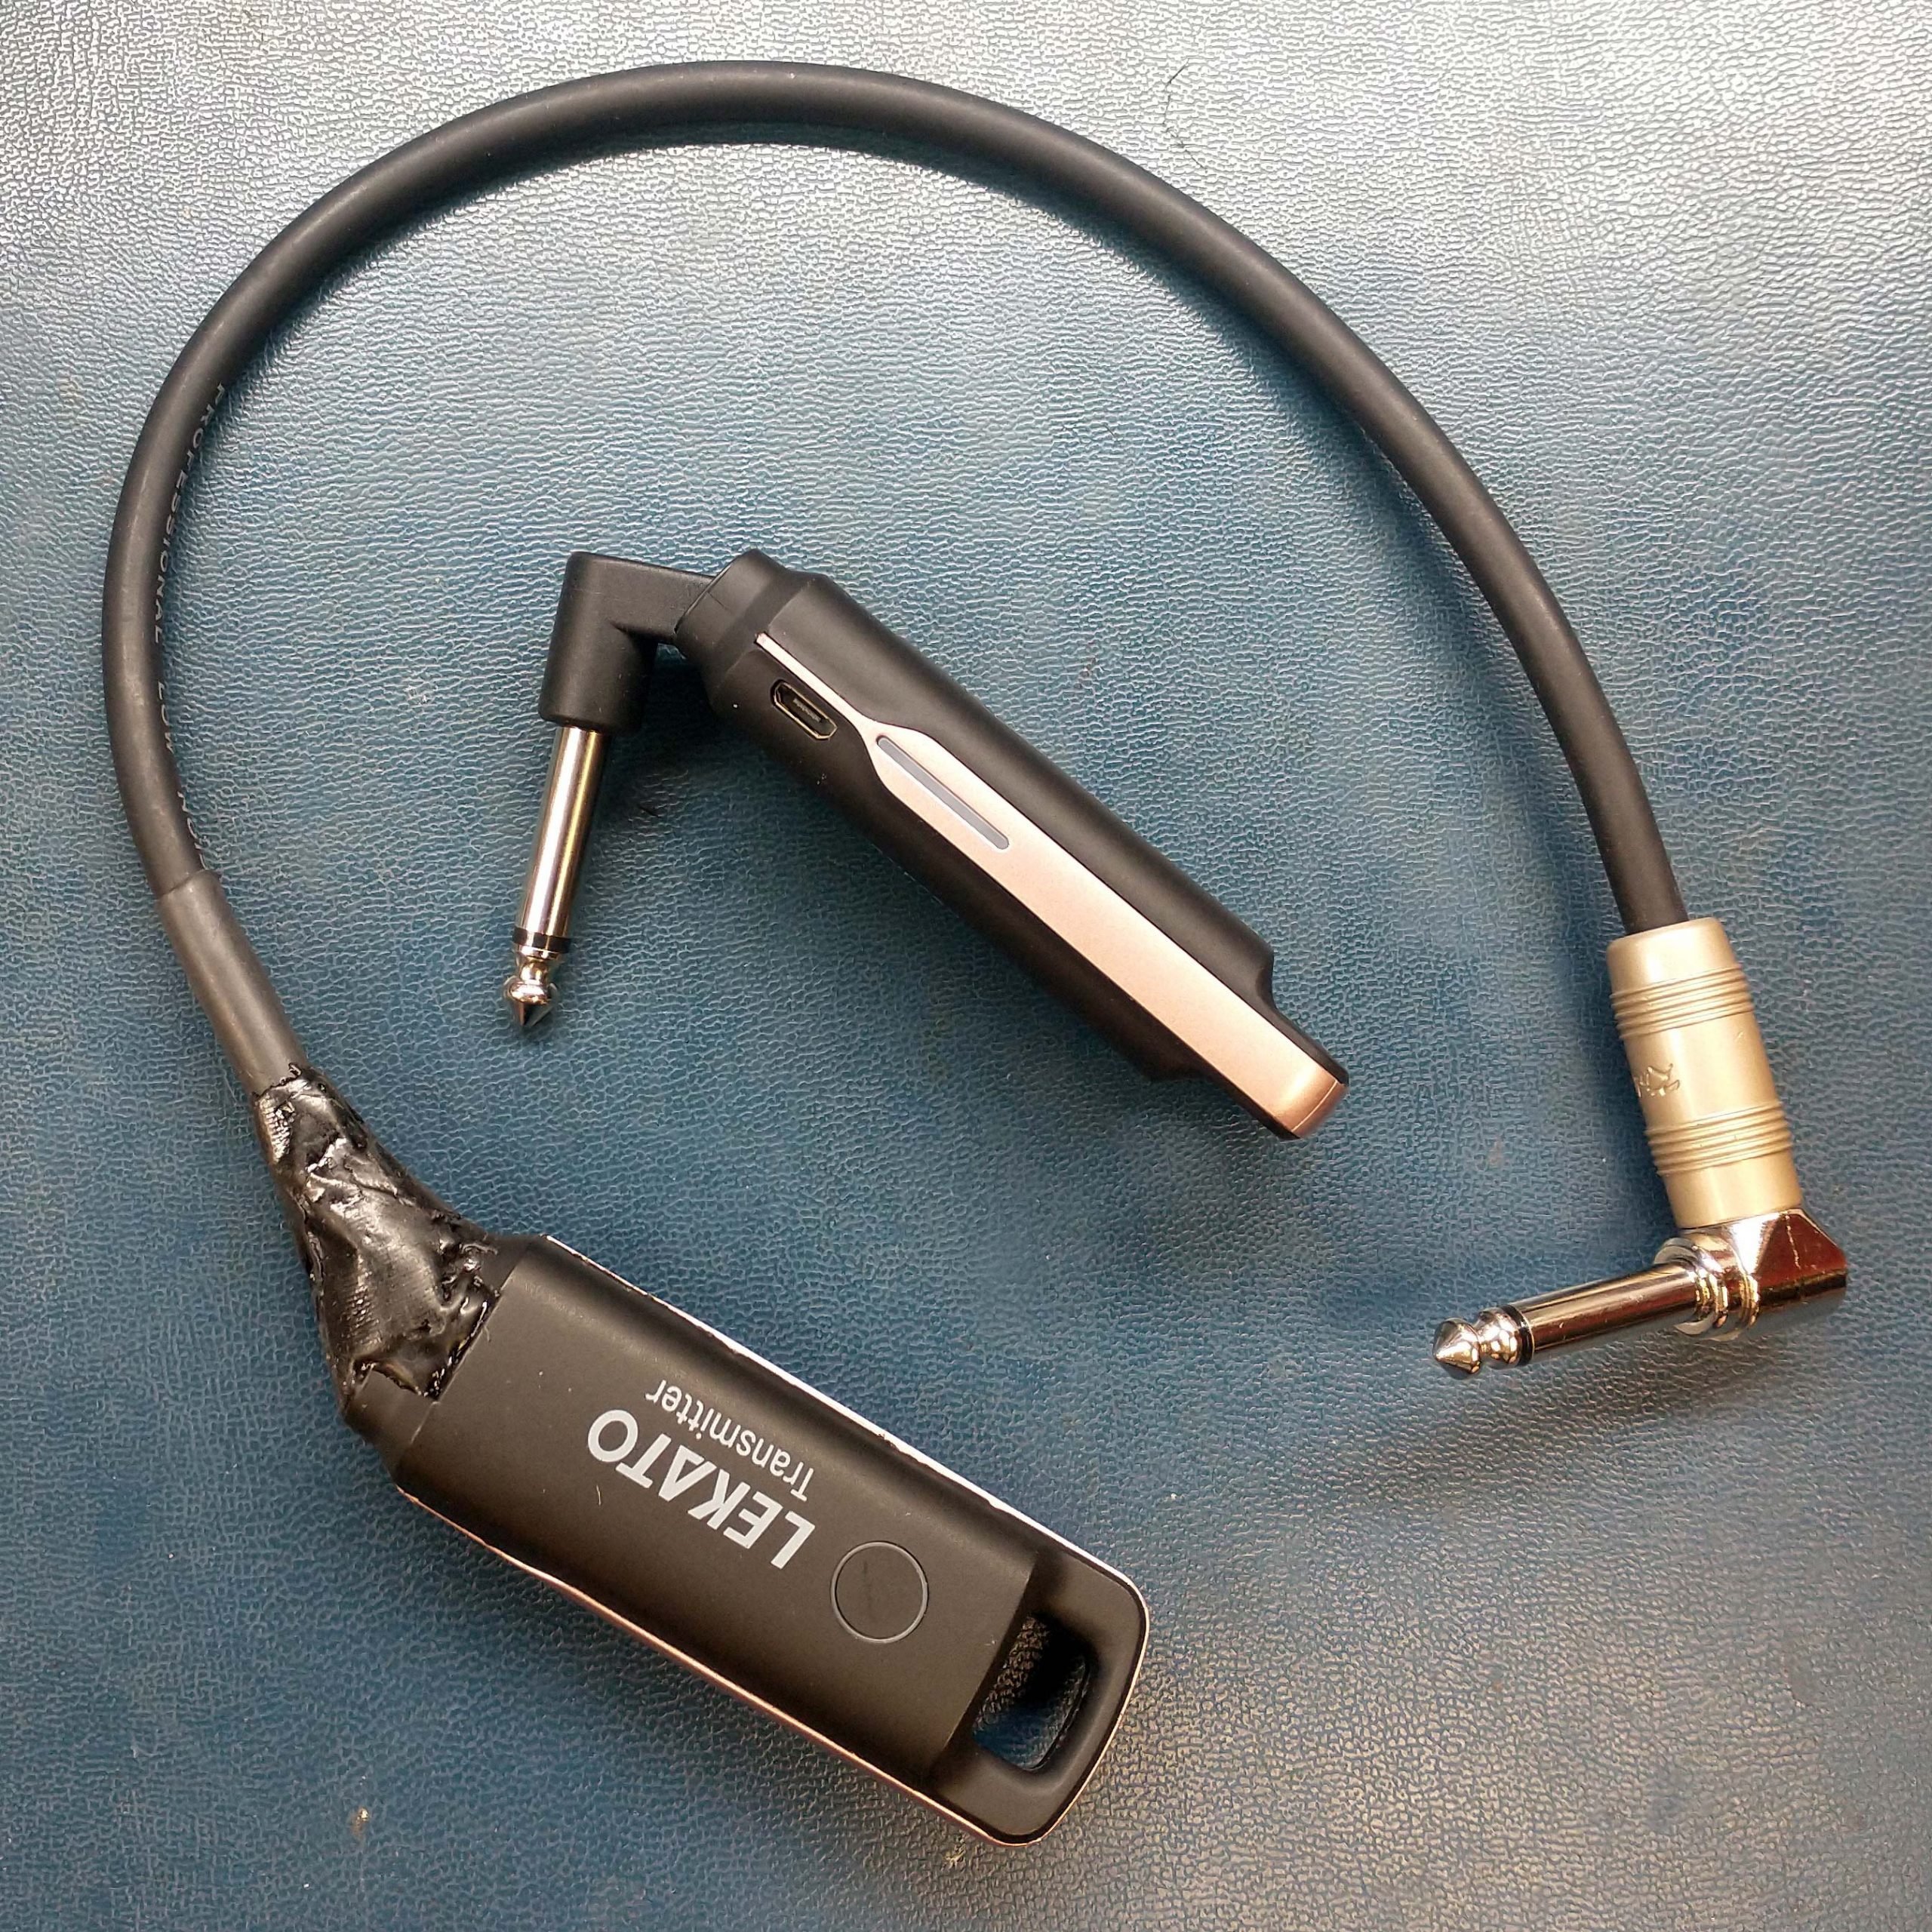
Lekato WS-70 Wireless Transmitter Modification
Making a modern wireless transmitter look a little more traditional
I recently purchased a Lekato WS-70 wireless guitar transmitter. I already own a Shure BLX14 that I often use with my large pedalboard, but the receiver unit on the Shure is rather large and won’t easily fit on my small gig pedalboard, so I’ve been on the lookout for a wireless system that would fit on my small board.


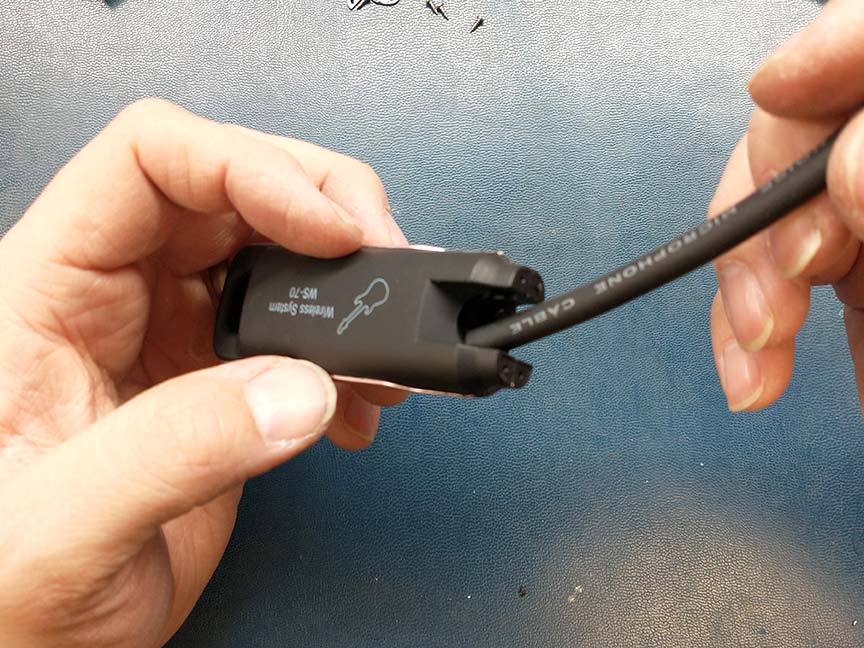
There are several of these small plug-in type wireless units on the market these days, but one of my main complaints about them is that they usually transmit on the 2.4 or 5GHz bandwidths. These bandwidths are used for many different digital transmission protocols (such as wifi, for example) and in most environments there will be a lot of traffic in these frequency ranges. Consequently, a guitar signal being transmitted in these ranges can easily cut out and become unreliable. So when I found out that a few companies were making these cheap wireless transmitters in the UHF bandwidth range, I was very interested. After a few Youtube reviews I decided to get the Lekato WS-70, which Amazon is selling for around $40. This is cheap enough for me to feel good about buying one even though I hate the look of a giant plug/transmitter hanging out of my guitar jack. So I got one with the intention of modding it to make it a little more like the traditional guitar transmitters that I’m used to using/seeing. I wanted to add a short cable from the transmitter that would plug into my guitar, while the transmitter was able to clip onto my guitar strap. Call me traditional, but I think that would look much better than a giant plug obnoxiously protruding out of my guitar.
There were no obvious ways to open up the transmitter, so I grabbed a small flathead screwdriver and started gently prying to see if I could find out how it was put together. I quickly discovered that it was held together with clips that were covered by the pinkish/goldish plastic outer band. I found that the end-caps could easily be pried of, which allowed me to start prying off the plastic outer band.
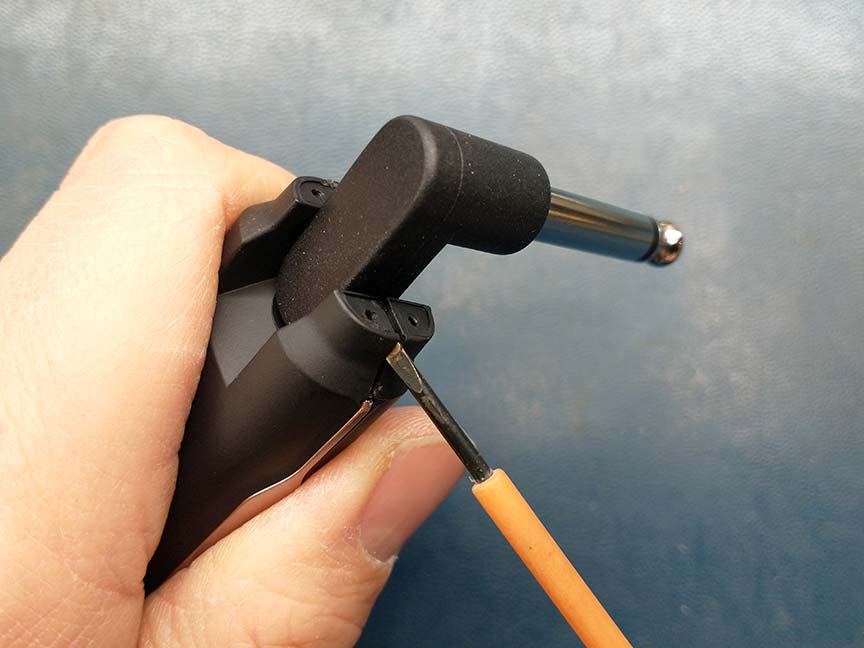
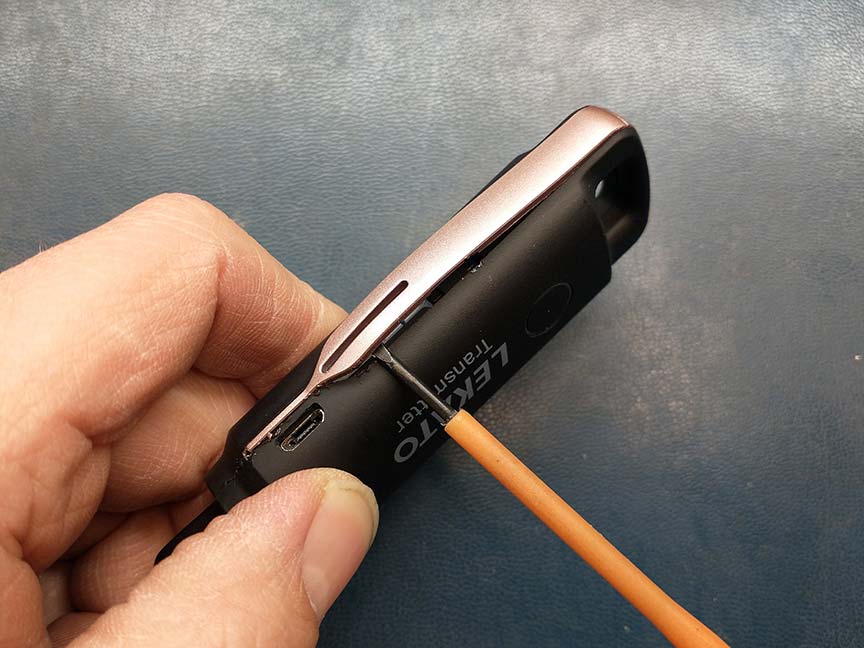
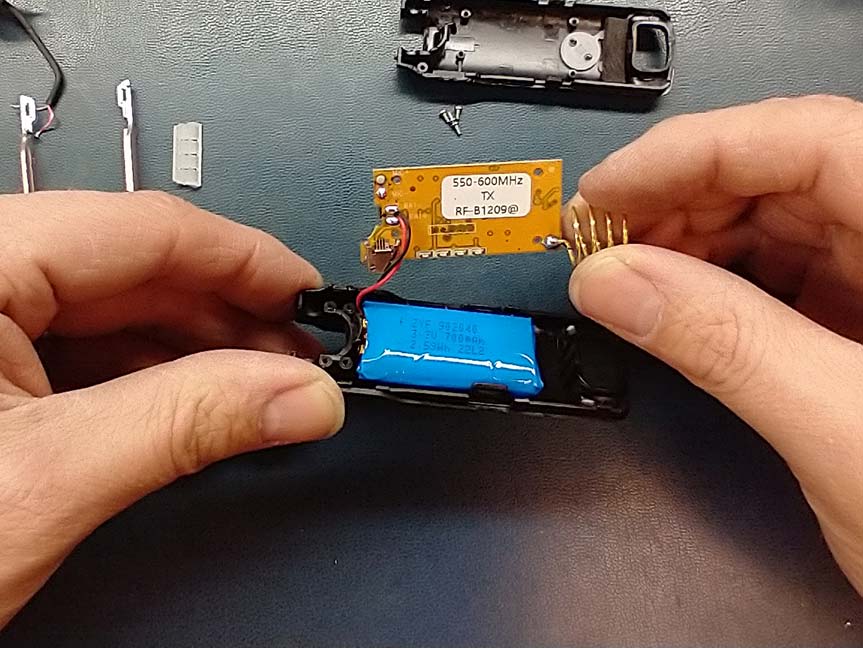
Once I got the edges of the plastic band off I was able to gently unhook the plastic clips that were holding together the black pieces. After the clips were unhooked I was able to pull the case apart.
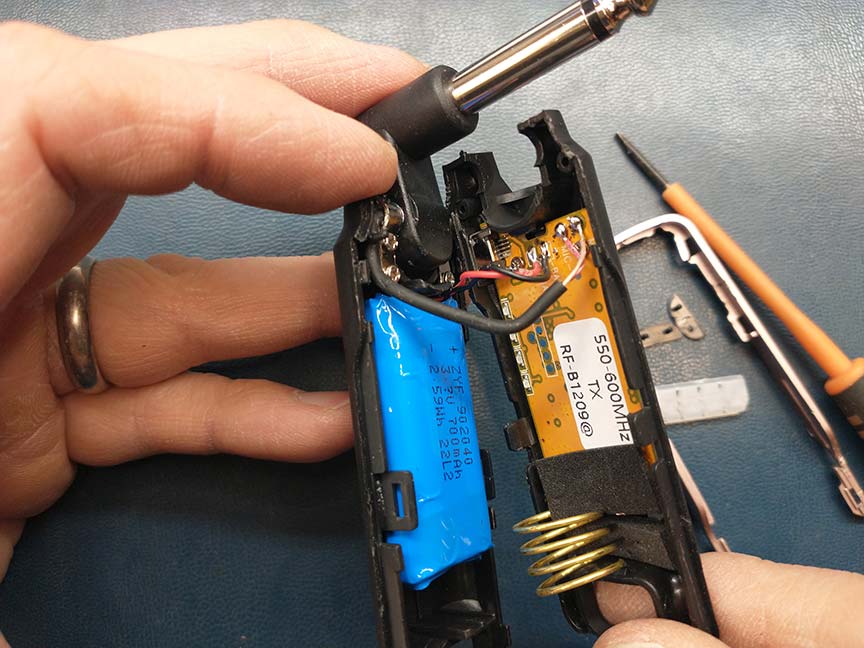
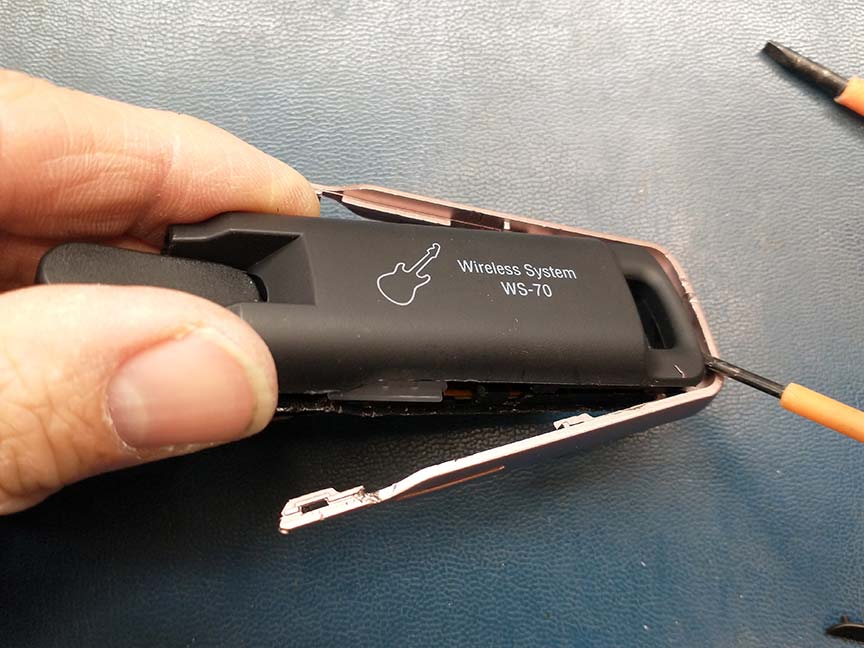
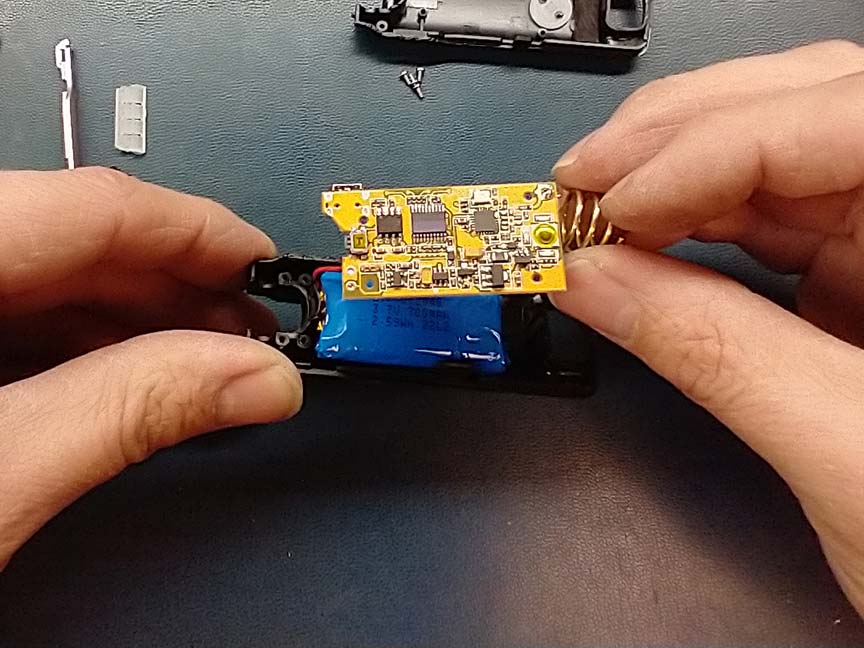
The clear plastic LED “light pipe” apparently wasn’t glued in place and fell out when it opened it up. This was not a problem because I was easily able to reinstall it when I put everything back together. Once the plastic case was open I could see the battery on one side and the circuit board on the other side.
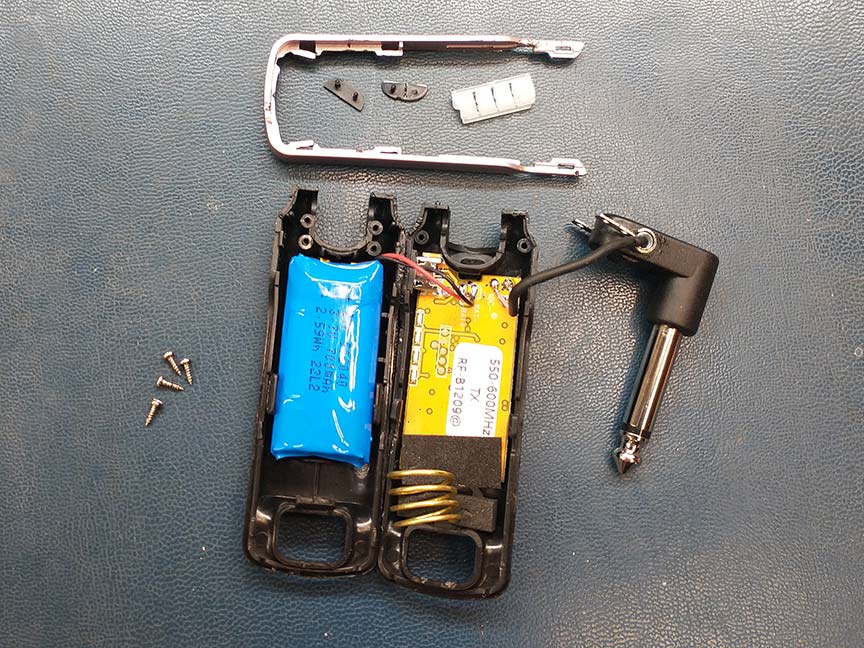
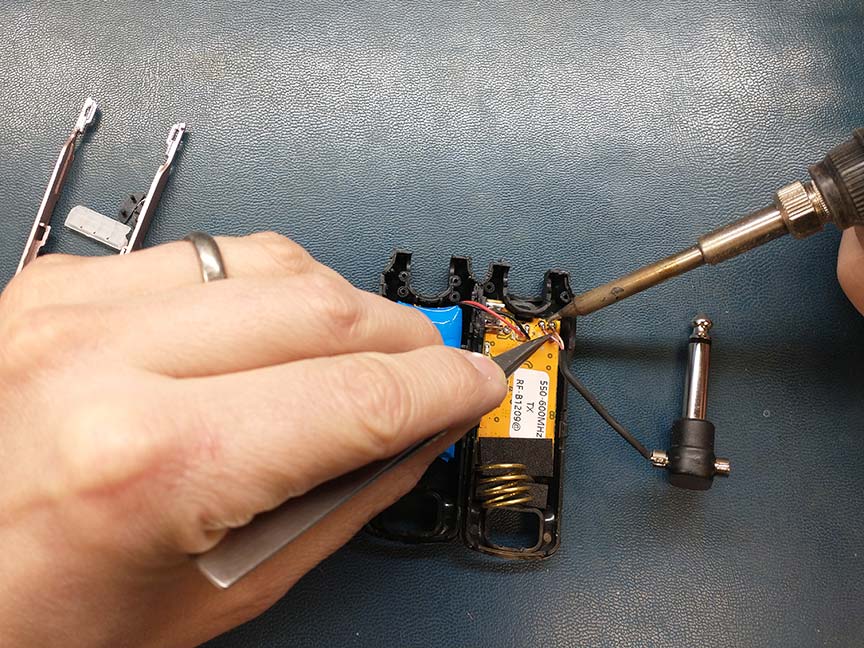
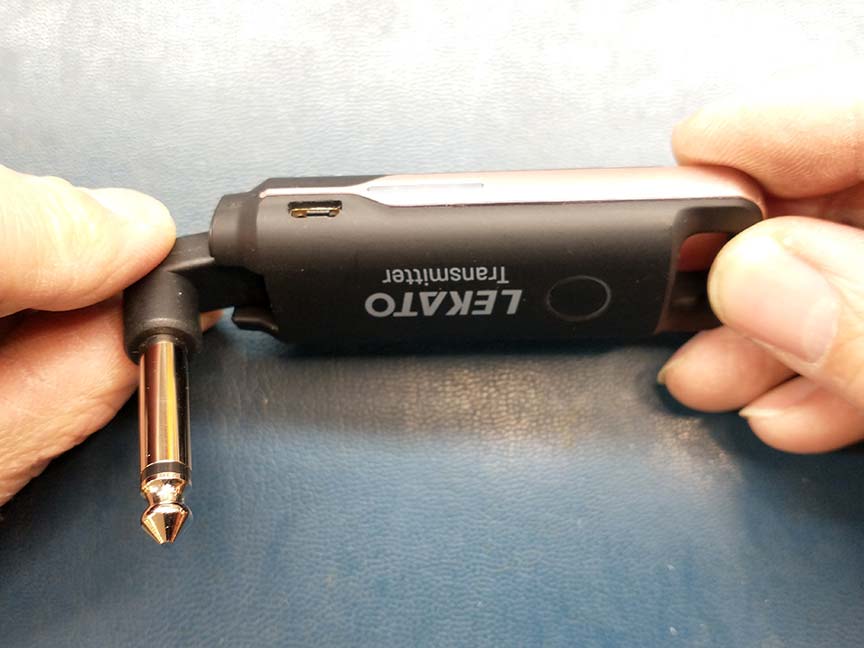
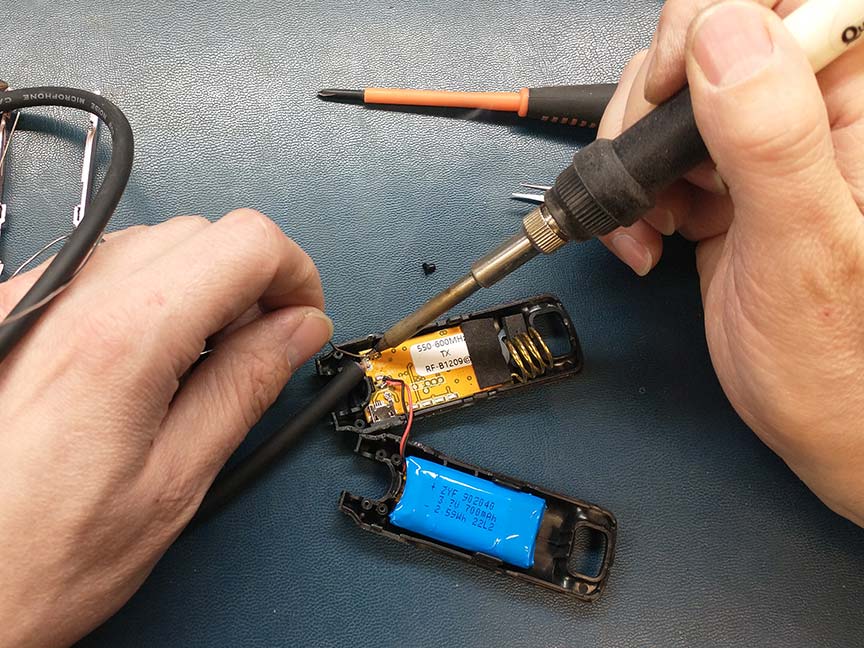
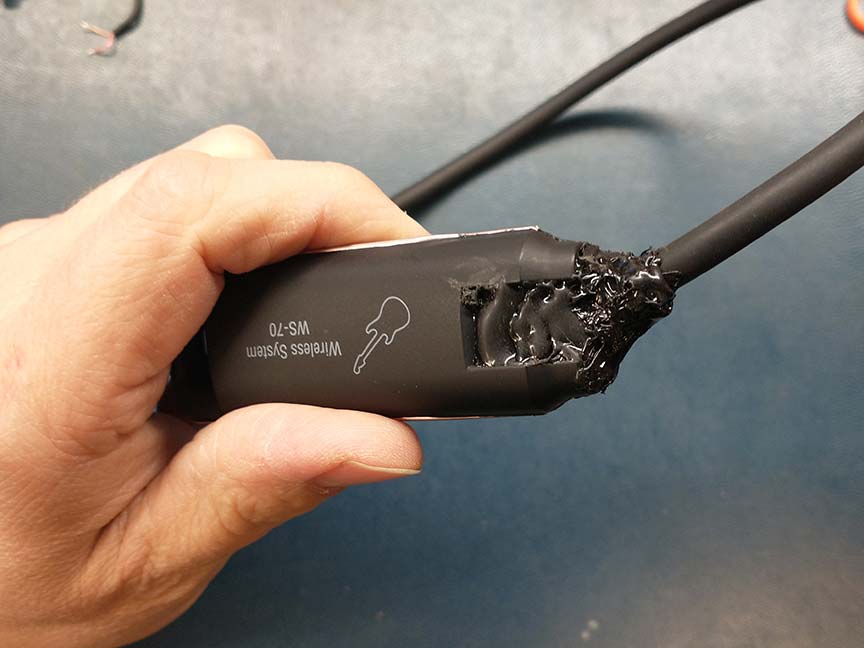
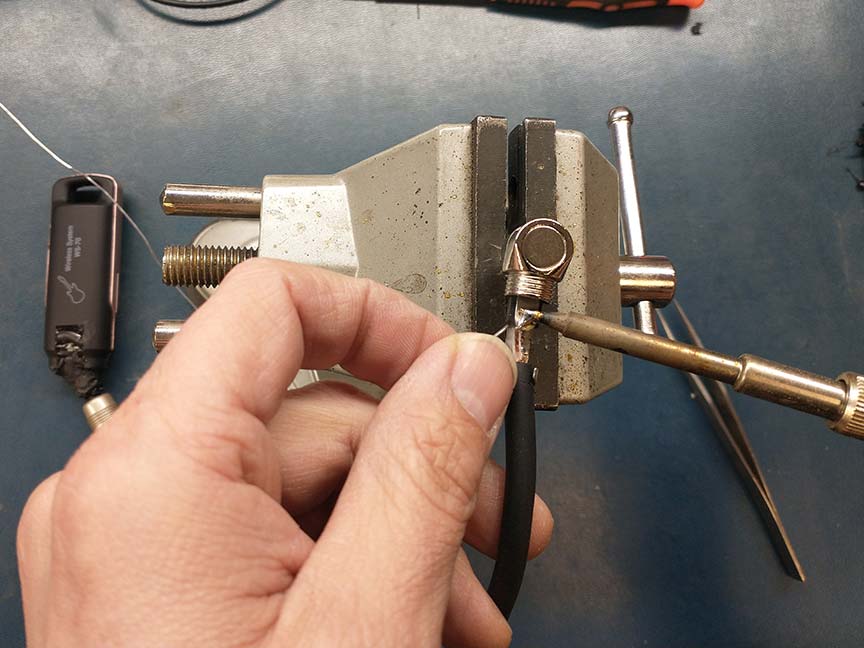
I removed the mounting screws that held in the jack and I unsoldered the jack wires from the circuit board. I noticed that these wires were soldered to the board with lead-free solder. I wanted to use lead/tin solder when I soldered the new cable to the board because it is much easier to work with. Which means that I needed to remove all the lead-free solder from these circuit board holes, otherwise the two types of solder wouldn’t flow together well and it would have a strong tendency to oxidize and crack over time. So I removed the circuit board from the plastic case and used my de-soldering iron to suck off all the lead-free solder, and then reattached the board to the case.


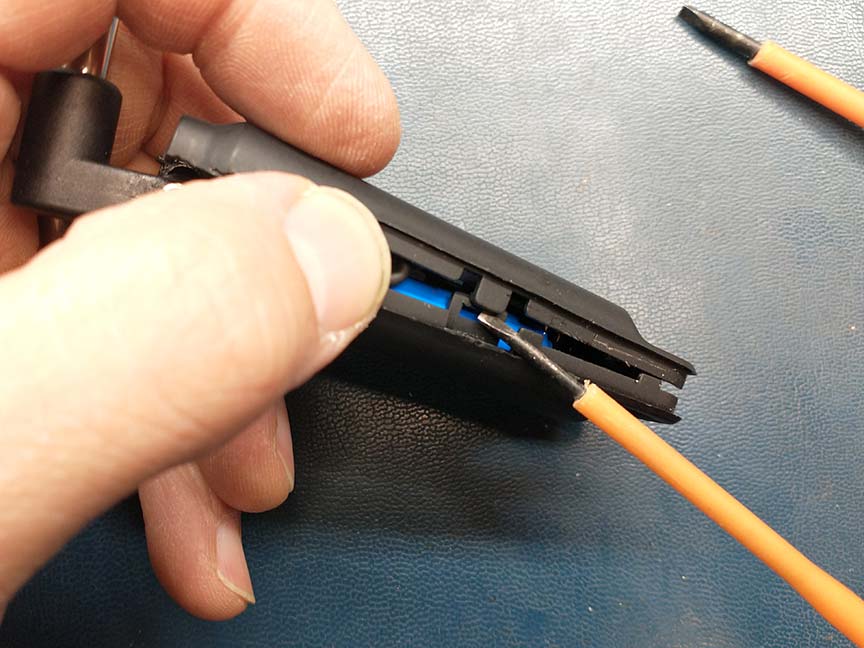
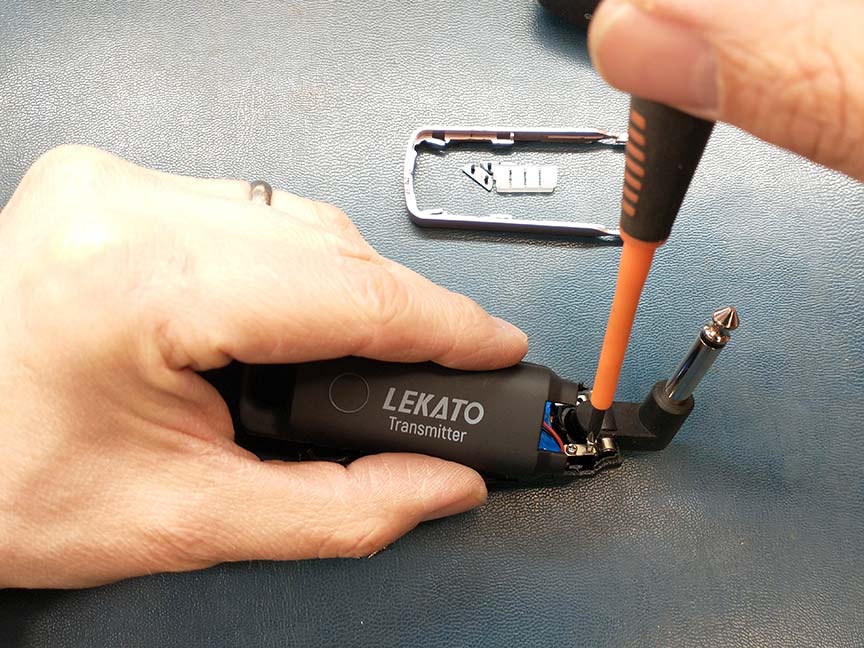
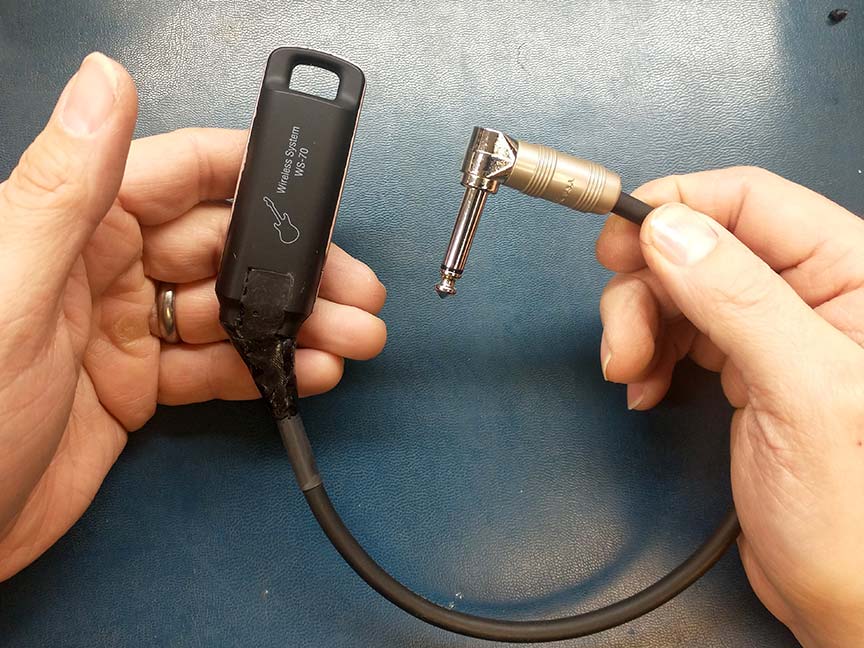
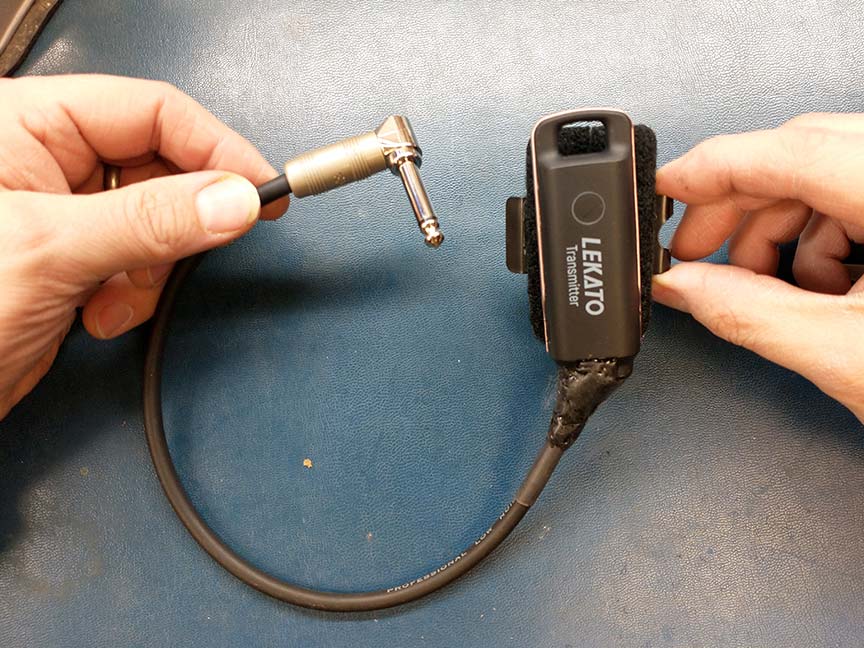
I stripped and tinned the instrument cable I was planning on using. I left it long for the time being until I was able to hold it up to my guitar to get an idea for how short it should be. I had to modify the case a little bit by cutting some of the plastic away so the cable could extend out of the case.

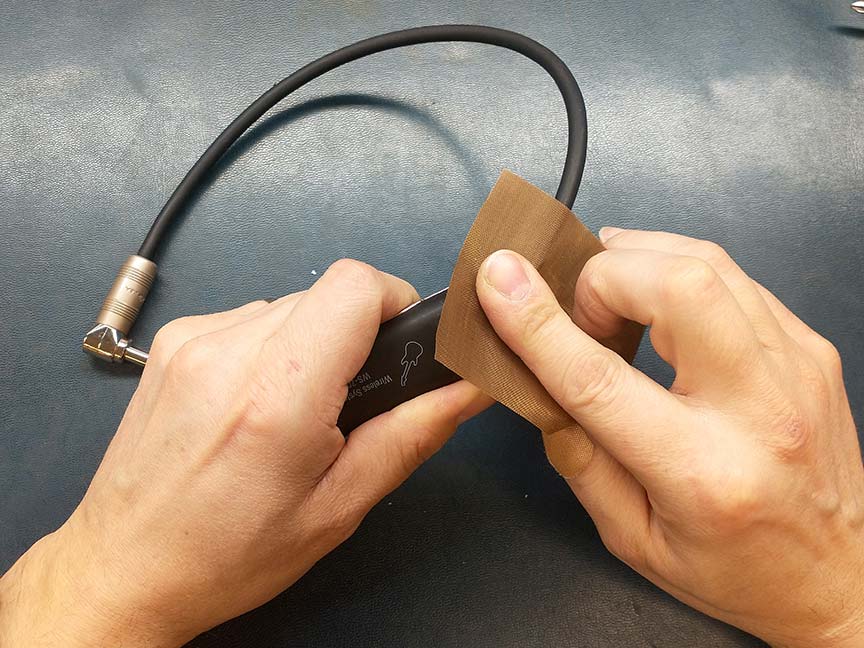
I was then able to start re-assembling the case. I took my time and lined up the top and bottom parts of the case while also installing the plastic outer band. I got it together without too much hassle.


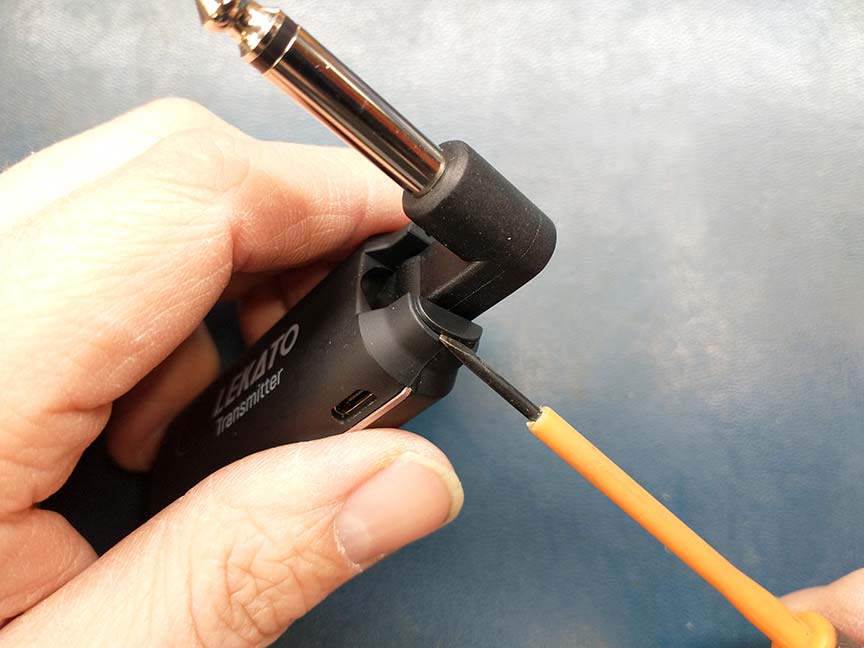
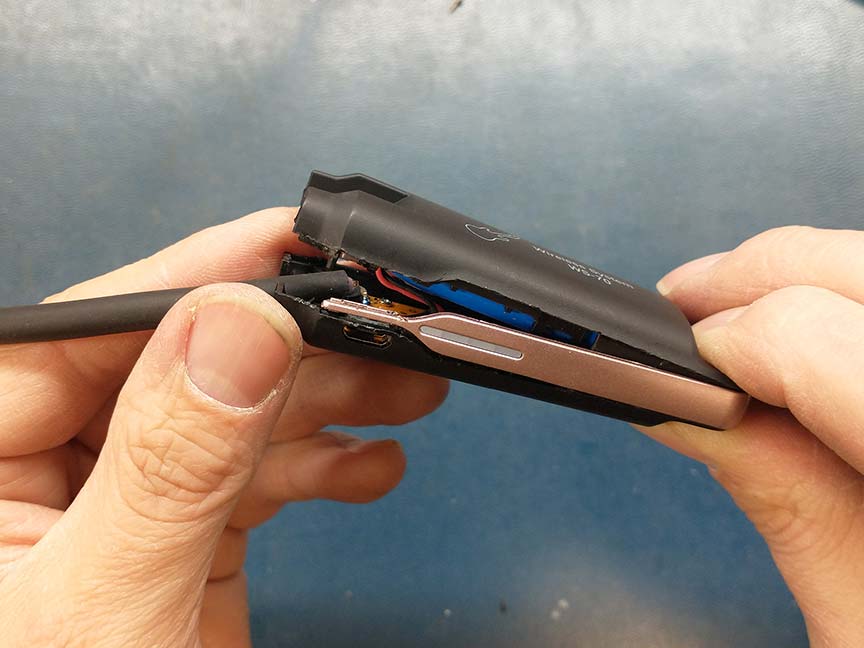
I started adding hot glue around the cable to help secure it in place. I added several layers to help build up it’s thickness. It ended up not being very smooth or nice looking at first, so I tried smoothing it down with my finger while it was still hot and pliable, but that didn’t work too well because the glue would just stick to my finger. Then I remembered that I had some Teflon sheets and I decided to use that instead of my finger and it worked really well. I was able to smooth it down with the Teflon while it was still hot and it didn’t end up looking too bad. It’s very professional looking but it’s good enough for this application.
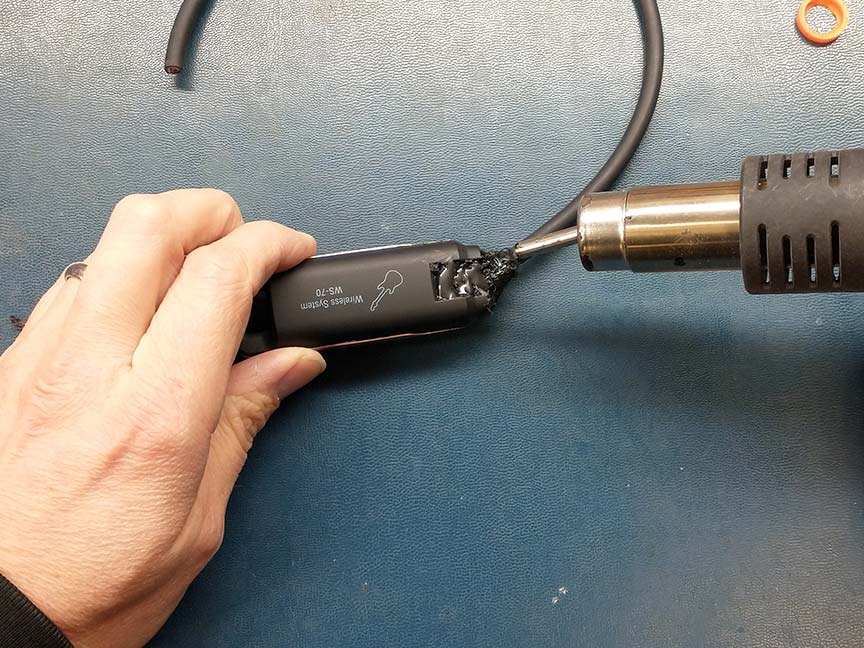


I noticed that the glue wasn’t sticking to the cable as much as I was hoping. It’s important that the glue stick to the cable to hold it in place, otherwise it could become loose and cause the solder joints to break. I eventually added a piece of heat shrink tubing over the cable to help the glue stick to the cable, and it worked really well. The heat shrink also provided some rigidity for the cable so it wouldn’t bend so much within the hot glue.


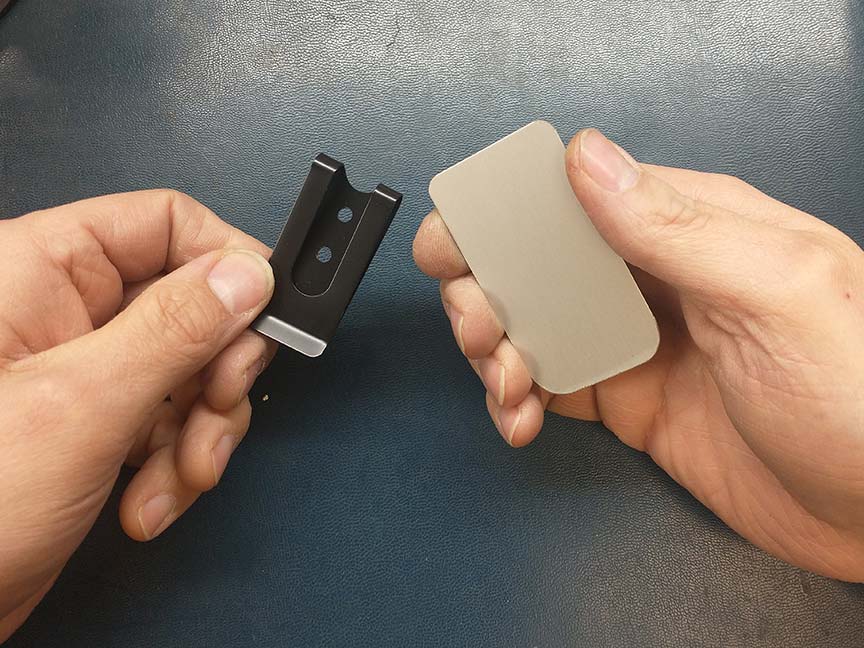
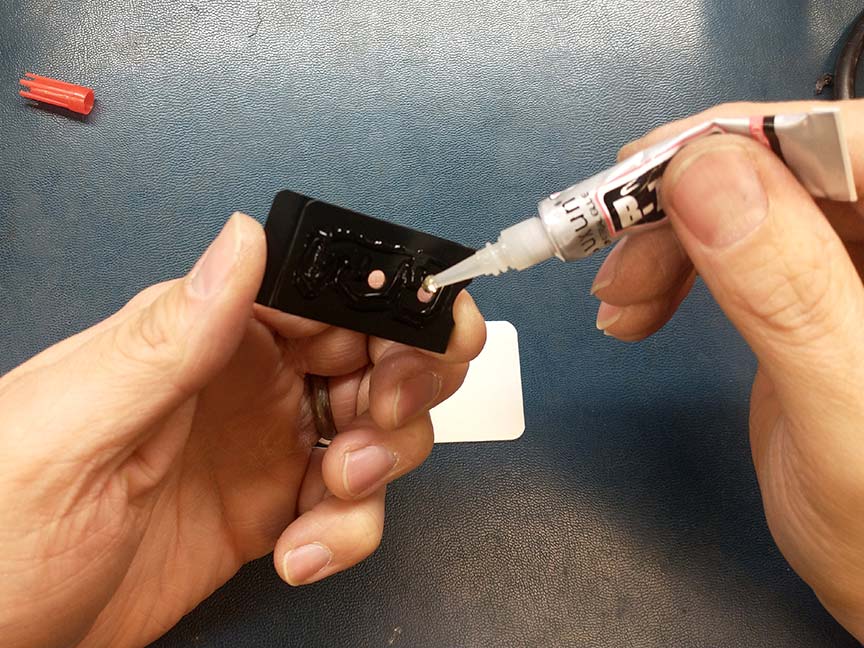
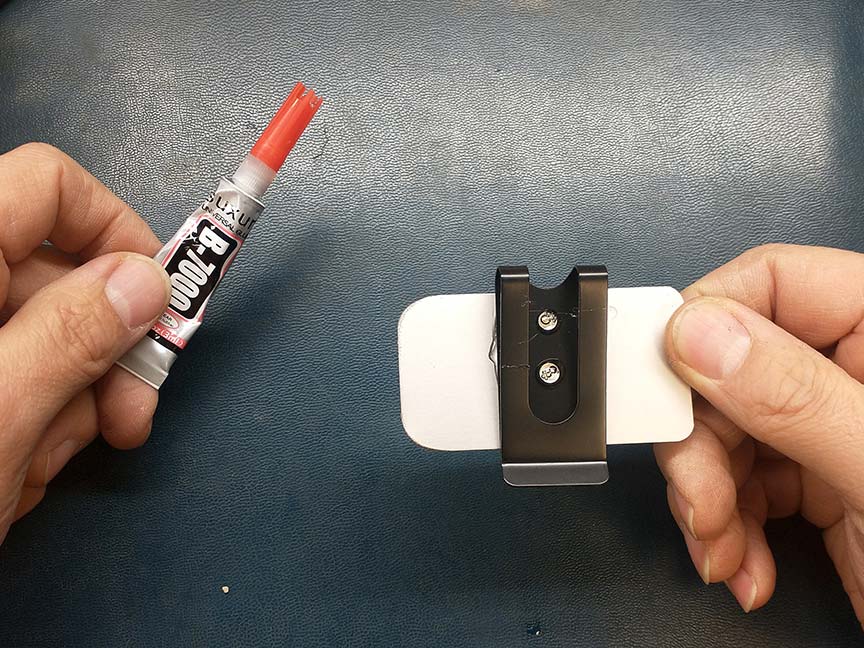
I wanted to use a belt clip to attach the transmitter to my guitar strap. I had a few extra belt clips left over from a different project I was working on a few weeks ago, so I planned on using one of those. The problem was that the clips I had were really large compared to the transmitter. It made much more sense to attach the belt clip to a piece of sheet metal (with my favorite B-7000 glue) and then use Velcro to attach the transmitter to the sheet metal. That way the whole system was more modular and I wasn’t suck with a bit belt clip glued directly to my transmitter. The whole thing came together very nicely and without any hitches.


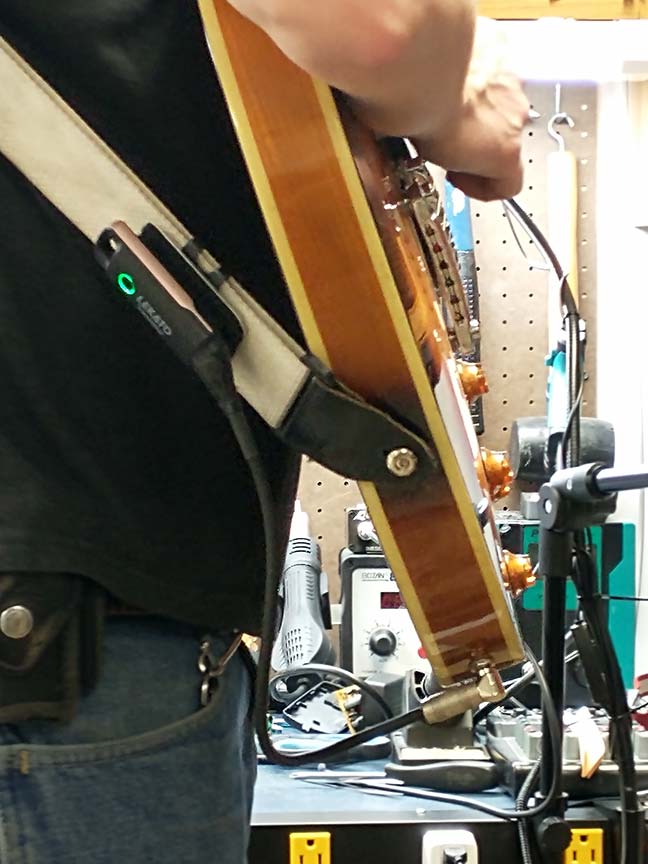
I’m really liking this transmitter in its current modded configuration. I think I even like it better than my Shure system only because it’s much smaller and more convenient to use on smaller pedal boards…but we’ll have to see how it performs in a real like gig environment before I make any serious opinions. If it works well I’ll probably have to get another one for backup, then I’ll have to mod that one too.

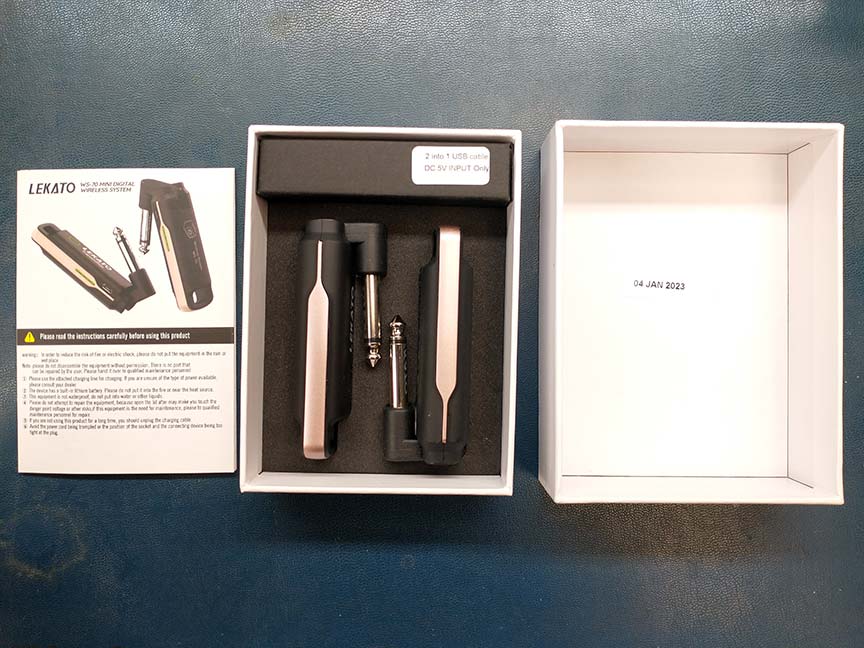
One thing I’m curious about is how long the batteries will last in a sound check / performance situation. I don’t want to have to remember to charge up my wireless rig in between the sound check and the performance. That’s why I often prefer batteries to rechargeable internal batteries. I did see one Youtube review that said the battery life with this model is around 4 hours, which might be on the short side if I’m playing a longer gig. Another option might be to upgrade the internal battery, or just re-case the circuit board and use AA batteries, like my Shure transmitter does. So there may be more blogs about this in the future, but for now I’ll just enjoy this modded transmitter for what is currently is.